
This is a long one, but it’s full of torches, alcohol, disasters, recoveries, hours of sanding, soot sprites and some pretty cool resin projects!

I’m not sure how I first got interested in resin projects, but I think it was when I found these cool wood resin rings.
I also saw many, many cool moss bio-dome projects on the internet, and somehow the idea came to mind to combine the two and make a moss bio-dome preserved in resin.


I decided to go for an easier project to begin with, knowing any kind of spherical mold is not going to be easy to work with, let alone the other complexities of such a project. I assumed my first few projects with resin would be learning experiences with poor results. Recalling a candle I had made many years ago as a birthday present for TT that had flowers preserved in it, I decided to make her a similar project using wild flowers preserved in resin instead of candle wax.

Fortunately I am blessed to be able to walk through these beautiful fields as part of my morning routine, and in early June they are full of a huge variety of wild flowers. It didn’t take much time out of my day to harvest them as I went. (Supplemented by a few blossoms I stole from my Mom’s garden!)
I looked up many methods for drying and preserving flowers. Many of them involve flattening the flowers, but I wanted to preserve the three-dimensional volume of the flowers so I went with silica sand. Smaller than silica beads, this can fill in and support flowers as they dry, keeping their shape.
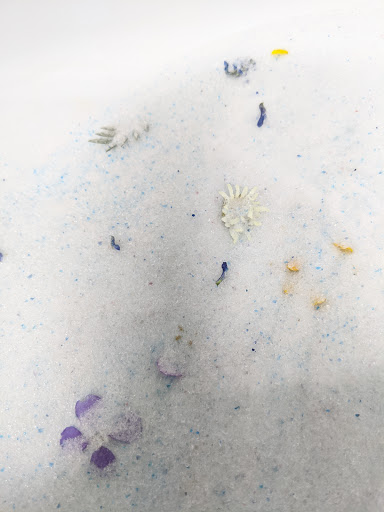
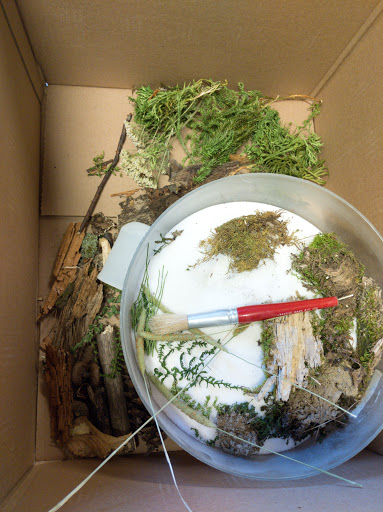
One of the delights of this project – which unfortunately I did not capture very well – is uncovering these hidden treasures after the drying period. After drying they are extremely fragile – rather than digging, it is best to slowly poor the silica sand into another container as the sands slowly unveil the beautiful treasures you buried just days earlier.
Tweezers and a very soft brush also come in handy. Some flowers held up very well, but others had to be grabbed carefully by the stem using tweezers. I kept them all in a Tupperware container with a lid for safe keeping.
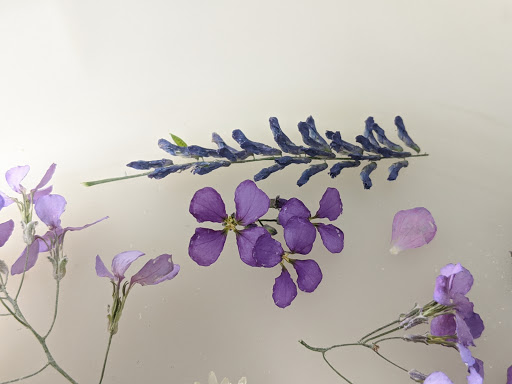
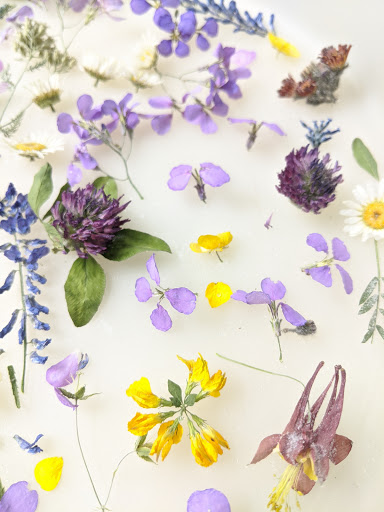
I read many dire warnings of the colors of flowers fading a lot when dried or preserved in resin, and while I did experience this to some extent, most of them turned out quite beautiful!
I was seeing in my mind these flowers arranged in an artful, picturesque bouquet. But when it came time to actually turn them into a resin project, reality hit me hard: I had no idea how to actually get that to happen. Ultimate I chose the “charge full steam ahead” method so I could get the “learning from my mistakes” stage over as soon as possible, and just threw stuff into the three molds I had, poured the resin, and hoped for the best.
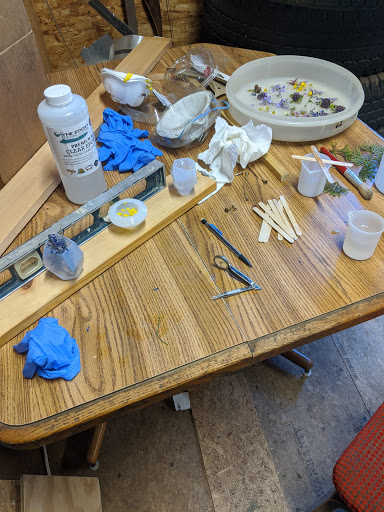
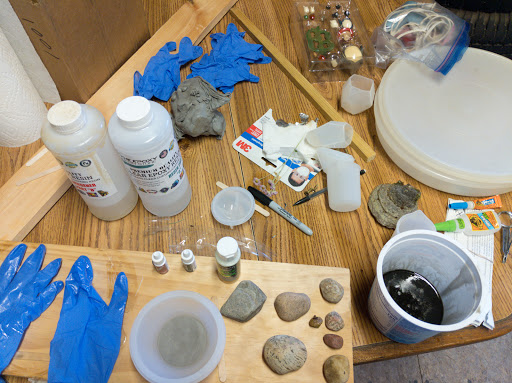
Did I mention I didn’t have a proper workspace? I was using some broken furniture thrown in the attic of our carriage barn. The broken table was not remotely level, so you can see I’ve artfully shimmed a board with some paper towels to rest my projects on so they would harden level. (Also notice the pile of disposable gloves – resin gets everywhere and is difficult to clean!)
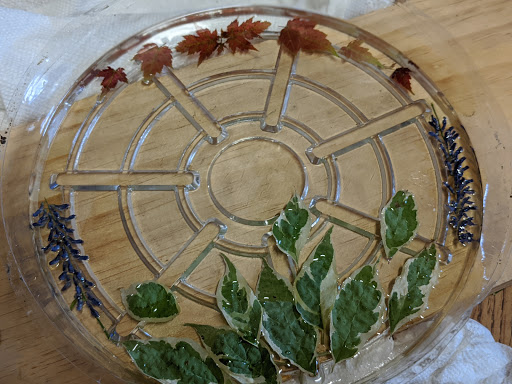
It didn’t take me long to realize my first horrible mistake: resin is heavy. Flowers are light. They float. With nothing holding them in place, most of my flowers floated to the top of the open-faced molds (what would be the bottom of the final project)
In spite of this they came out looking alright. They also had a lot of bubbles – something I sort of anticipated, but I wanted to see how bad it would be.
Some people thought that enhanced the visuals; though it does obscure the view of the flowers. I don’t think it hurt these projects, but I could see how it would be problematic in the future so I decided to give it another shot with some different techniques to reduce bubbles:
- A wide, shallow mold causes fewer bubbles as they can more easily escape
- Using a torch or heat gun can eliminate surface bubbles
- Pouring a thin layer of resin, putting the flowers on it while it is still tacky, then letting it harden before finishing the pour can “freeze” the flowers in place so they don’t float
First, time to collect more flowers!
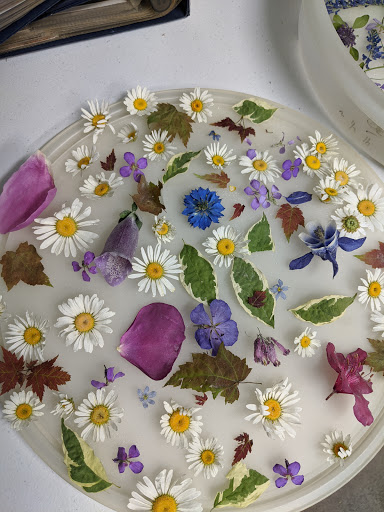
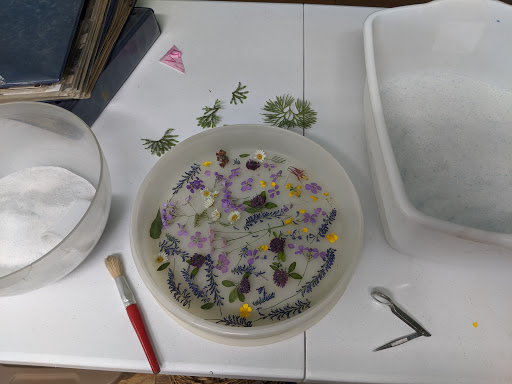
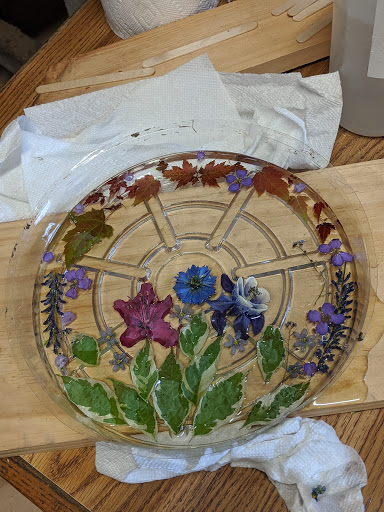
I didn’t have a very clear vision for this next project. I also didn’t have time to find a mold. I frantically searched for anything that might be wide, flat, and circular to use that I also thought I could get the resin out of — rather than having it stuck there indefinitely.
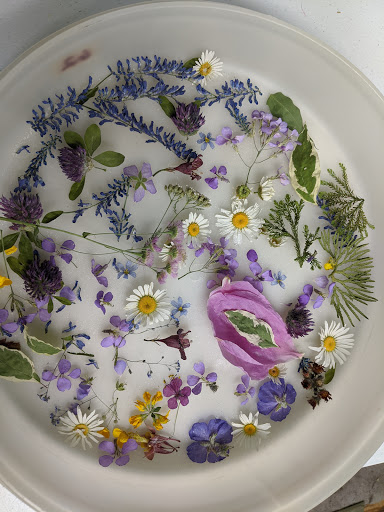
In the end I found a disposable flower pot liner and started throwing in my latest dried flowers and leaves willy-nilly. I was afraid of over doing it and adding too much.
In a comedic cooking advice booklet I suggest trying to only cook the VERY BEST, MOST AMAZING MEALS:
If you try to cook a pretty good meal and screw up, it will just be an O.K meal. If you try to cook an AMAZING meal and you screw up it will still be a really good meal. People will confuse “is a good cook” with “makes good meals” and think you’re
a good at cooking when in reality you’re just bad at cooking very good things!
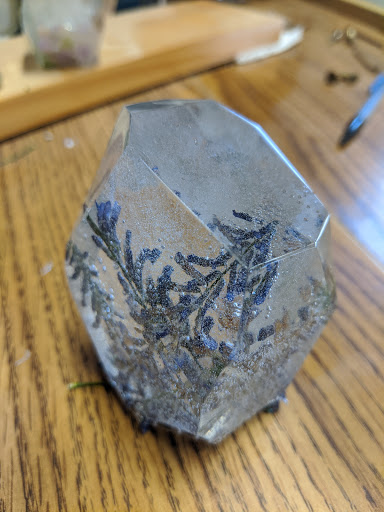
I’ve found this principal to be immensely beneficial in any endeavor. Most people don’t even realize that, much like the first three, this project was also a horrible disaster – because despite how much I screwed up, it still looks good.

I’ll briefly, but not thoroughly, categorizes the many failures of this project:
- As seen above, the mold had a leak
- Because the mold leaked, the entire thing got glued to the board it was resting on. It was very difficult to remove without also breaking the resin cast. I had to use a system of many Popsicle-stick wedges, working them under the unstuck side at first and gradually moving them closer, until I was able to use a butter knife to break the cast free
- Also, the resin did not release from the plastic mold. It was difficult, time consuming, and frustrating to peal the mold off of the resin in shreds, spending hours trying to pick the last pieces of plastic mold off.
- Despite my best efforts, the arrangement of flowers still floated and shifted, “ruining” my original layout
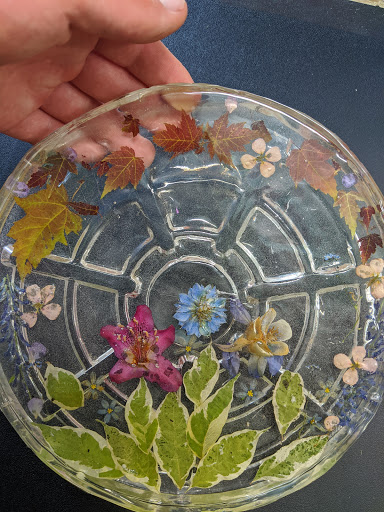
- Preserving the 3D shape of flowers worked against me here — I was trying to do a thin, flat pour. Instead it ended up really thick, AND some of the flowers still poked out of the top.
- The torch, while effectively removing bubbles, also melted my plastic mold (duh) making it even harder to remove, but also making the final shape not perfectly circular
- It dried too fast, meaning the resin dried out before it fully leveled, so the final product has waves and ripples of expanding resin instead of a smooth, flat top surface
- Some of these flowers weren’t preserved well enough, and lost their color, got damaged, and fell apart during the casting process
My main takeaways were:
- Always use a proper silicone mold, which will easily release resin and can withstand torch heat and won’t leak
- The torch works wonders on bubbles
- Anything you want to stay put needs to be secured in place somehow
These projects took me roughly three weeks in June, from collecting flowers to the final resin pour.
In mid-July, after licking my wounds and ordering some new material, I ambitiously decided to move on to my dream project of a moss bio-dome,
While I did think I had learned some things from my previous projects, like many of my endeavors, I mostly chose to advance on to this project because there was a birthday coming up for someone who I thought might appreciate such a project.
Step one, collect materials!
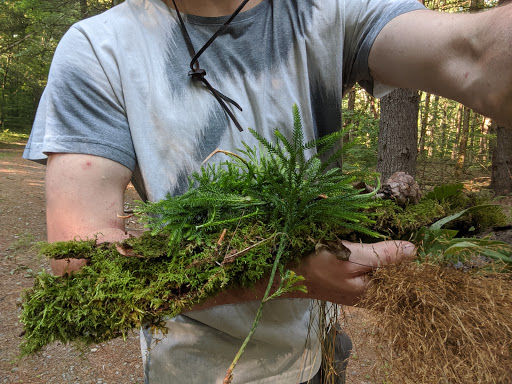
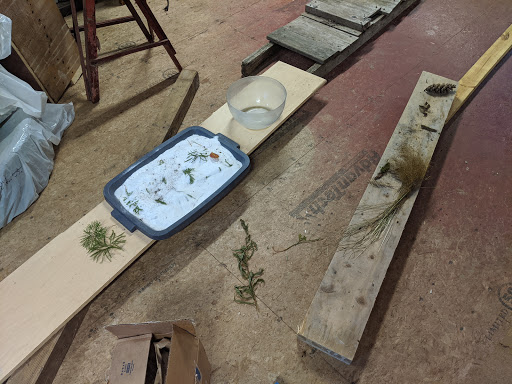
I had a difficult time balancing all of this on my arms, and got quite a hand cramp trying to hold on to things until I got home on more than one occasion! I collected a LOT of material from the woods for this project, because I didn’t know exactly what I was going to do. I wanted enough things to choose from that I could improvise as I got started.
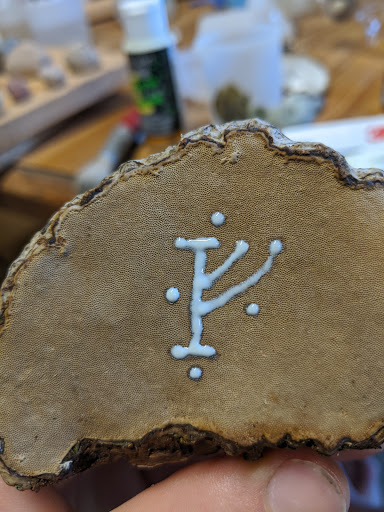
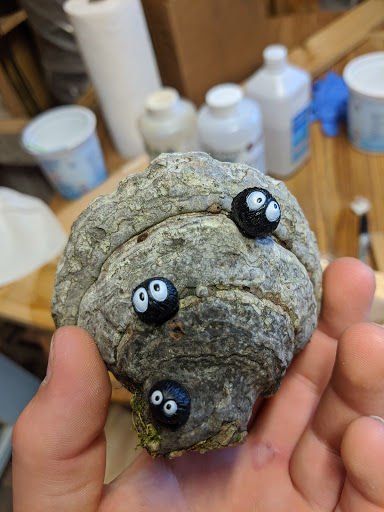
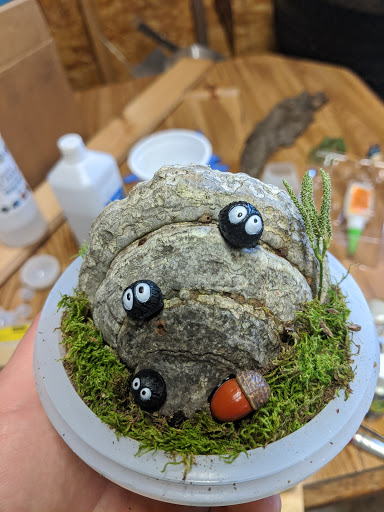
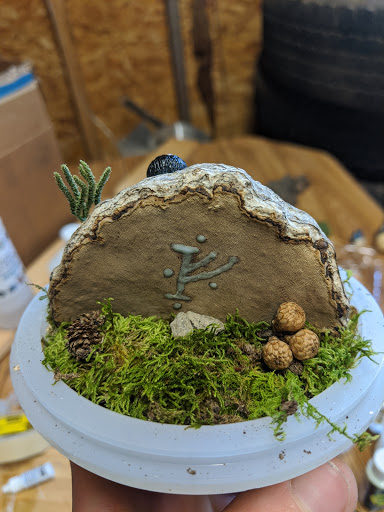
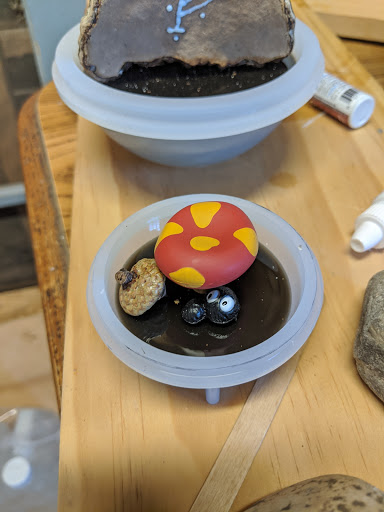
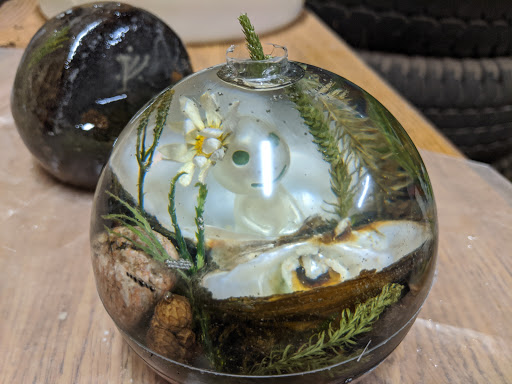
I found this really neat mushroom that was as hard as wood and almost the perfect size to fit in my biggest spherical mold. Said person with a birthday upcoming recently had her tablet screen break and made light of it by saying it looked like Gandalf’s rune; which tangentially inspired the idea to paint Gandalf’s ruin using glow-in-the-dark paint on the back of the mushroom. (This had to be painted in many layers to get it thick enough. It was hard to find a thin enough paintbrush. I also one time accidentally touched it when wet and ruined it!) I’d also been watching a lot of Studio Ghibli films lent to me by this person, and figurines from some of Hayao Miyazaki’s films just seemed like they would be right at home in a little nature diorama — pictured above on the other side of the mushroom are Soot Sprites from My Neighbor Totoro and Spirited Away.
In the first picture, you’ll notice clay in the bottom of the big mold. This was put in first so that, when removed at the end, the final cast would have a flat bottom so it could be placed on a shelf without rolling off.
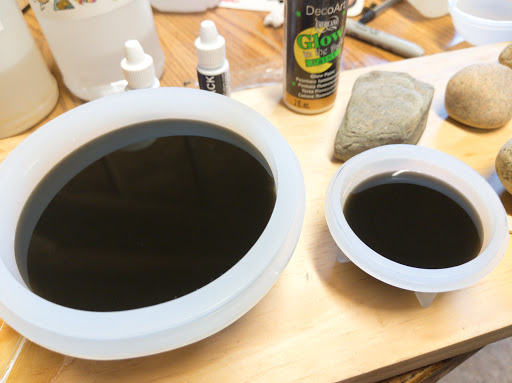
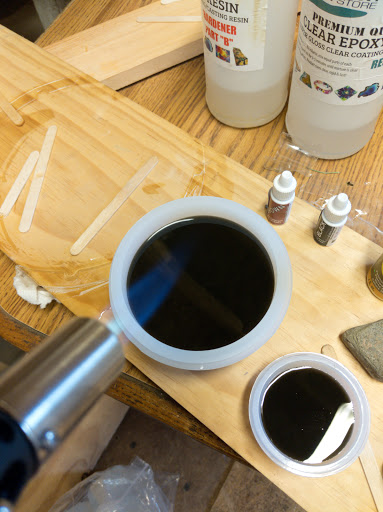
Next, I purchased some resin dyes and made a very dark brown/black resin mixture for the base poor. This is the “ground” that the moss “grass” will grow on top of.
My cramped work space is becoming increasingly cluttered.

I did learn some things from my first project. This time, everything was glued down. Early experiments proved that moss cannot be super-glued to resin, so I had to use hot glue for the first layer. Super glue was used in all other cases, as it works much better and more cleanly to affix all other items to each other.
The big unknown was working with a spherical mold. They come in two parts, and I’d heard horror stories about them being forced apart or leaking during the curing process, causing a huge spill and ruining projects.
To reduce bubbles, I did one poor over everything to seal everything organic so it wouldn’t leak air and fill in the cracks. I taped the edge of the mold to make sure the edge could be easily cleaned when it came time to put the top half of the mold on and finish the pour.
I was very pleased with how this one was coming out – I thought the concept and execution looked great – and I thought it was going to be amazing as long as the mold stayed sealed during the second pour.
To build some anticipation for the final result, I’ll go on some brief tangents of some other complexities of working with resin.
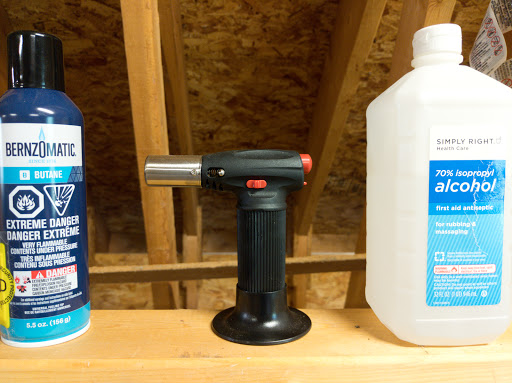
This small butane torch was acquired recently by my sister to toast marshmallows for a baking project. It served me well as a bubble-remover on my resin projects.
The alcohol was used for clean up. I cannot stress enough that resin is very messy and well get everywhere and the cleanup process for each pour is tedious and lengthy. Each mixing container (inside and outside) and stirrer (the resin has to be stirred for ages before pouring) has to be cleaned with the alcohol, pictured above, as well as any surfaces it may have got on.
My oldest brother was alarmed at the combination of a torch and alcohol, and advised I don’t use them in close proximity. (Lest I catch the fumes on fire and cause a fireball) Luckily the alcohol doesn’t come out until after I’m completely done using the torch.
Using said torch to get rid of bubbles on my two bottom pours. (Bonus: in the backdrop you can see where my other project leaked and sealed to the board..)
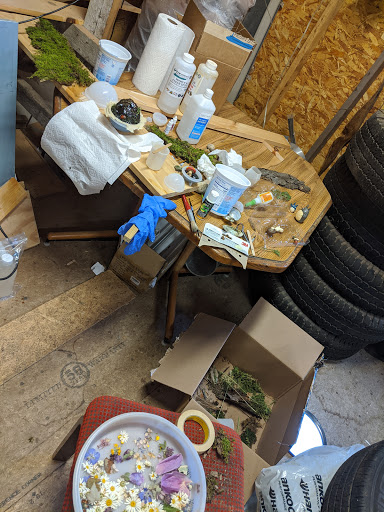
My increasingly messy setup, spilling over onto the chair and floor.
Concept for a secondary pour.
I had only planned to use the biggest mold, and didn’t really have any particular ideas for how many or what to make except that I wanted to at least use the Soot Sprites, Kodama, and Totoro figurines.
Many of my smaller pours, such as this one, occurred just because I mixed too much resin and didn’t want it to go to waste.
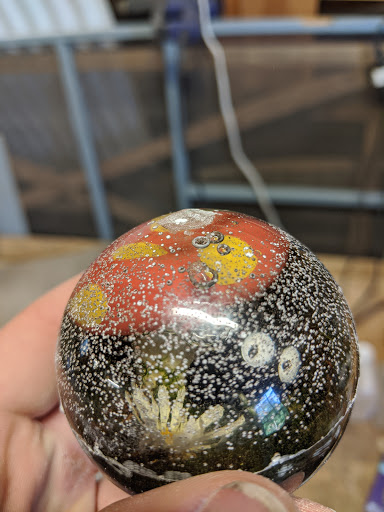
Now, for the result of my big pour. . .
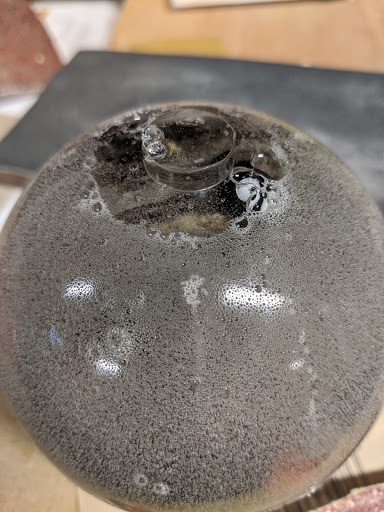

Disaster.
My beautiful, carefully crafted nature diorama is indecipherable beneath the absolute hail of bubbles that appeared, except the baleful eyes of a few soot sprites staring out of the haze. (Not to mention the expected stem and seam line)
I tried so hard to avoid this. Although I realized as I began this project I wouldn’t be able to use the torch once the top half of the mold went on due to the small opening, I still used other techniques to prevent bubbles: for an example, if you do multiple pours the bubbles are reduced. If you pour all at once, the bubbles at the bottom can’t reach the top before the resin cures, so I did smaller pours one by one. (Including the initial pour to seal everything)
Secondly, the faster it cures the less time there is for bubbles to escape. The attic I was curing them in was so hot that resin cures very quickly, so for this creation I had let it cure in the much cooler basement instead.
All for nothing!
To top it all off, I was running low on resin and for some reason the resin stuck on a small part of the mold and tore a hole, so doing new pours was impossible. My deadline was also fast-approaching.
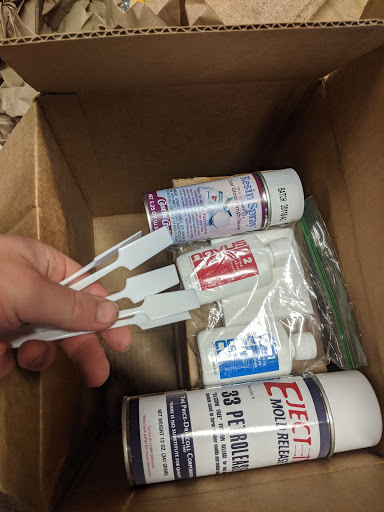
A panicked flurry of shopping, borrowing, and brainstorming I tried to come up with a way to salvage this creation and make new ones:
- Borrow a Dremel tool to get rid of the stem and to grind down the sphere so that hopefully more of the contents are visible
- Sander to flatten the bottom (the clay wasn’t level) and/or possibly help remove bulk amounts of resin from the sphere
- Very fine grit wet/dry sand paper, as well as polishing agent and a microfiber cloth, to attempt to polish the sphere to a shine after removing a bulk of resin
- Ordered more resin
- I also did some research and found a different type of resin from a different supplier that was meant more for the kind of pours I’m doing. It turns out the resin I was using was meant for smaller or flat pours, not large solid objects. The new resin I ordered was thinner and takes longer to cure, so more bubbles can escape. This is a double-edged sword as I was quickly running out of time and was not sure I could make new creations in time with a slower-curing resin
- Ordered a new mold
- Ordered a mold release spray to treat molds to make sure it will release easily; to avoid future mold tears and/or trouble releasing resin
- A sealant/spray that may trap more air in organic material to prevent them from releasing air bubbles and/or to spray the final product to make it shine.
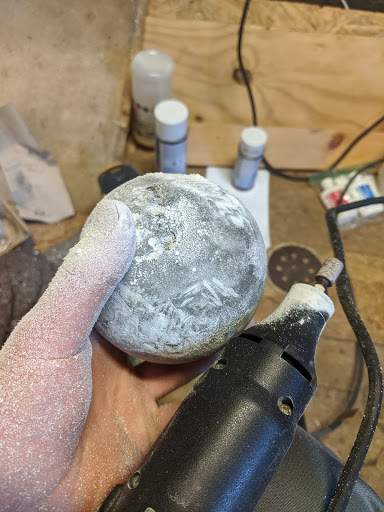
The process of sanding and grinding down the large sphere was very long and tedious. I had to repeatedly clean everything to check and make sure I wasn’t getting too close to any of the objects within; I didn’t want to accidentally cut into one of my Soot Sprites.
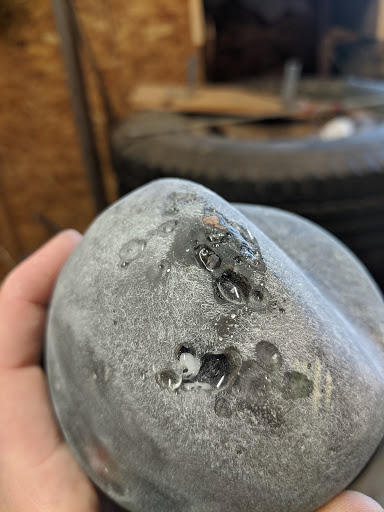
These large bubbles are problematic. I can’t sand them out without destroying said soot sprites. You can already see the tip of the mushroom as been damaged at the top.
My smaller mold had similar issues. It didn’t look as bad at first, but after I ground off the stem and mold line, the bubbles filled up with dust, turning them white and making the whole thing look even worse.

Here are the 6 layers of sand paper of decreasing grit I used to slowly polish it off. If you’ve ever sanded anything, you can feel my pain. If you haven’t, try it sometime – great exercise in patience and endurance.
The picture is misleading as I also needed to spend a decent amount of time with a larger grit sandpaper to actually take off a thick layer of resin evenly. Since I wanted this one to remain spherical, I couldn’t use motorized means like I was for the bigger sphere.
A lot of patience and getting up early to spend some hours working on it.
Did I mention I was working on a different, time-consuming, non-resin project at the same time? More on that later!
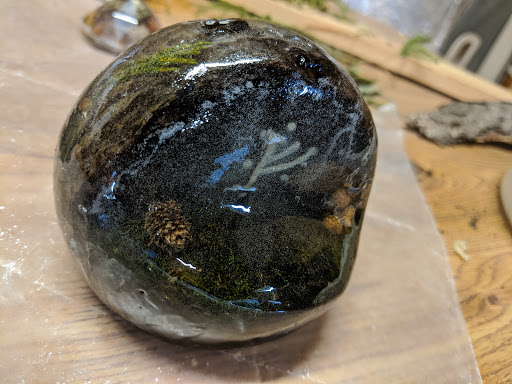
Luckily, after rinsing off the dust, it appeared my labor was not in vain! It was starting to look pretty clear and shiny.
But my bigger resin sphere had bigger problems — remember those big, ugly bubbles at the top?
I decided I need to fill them with more resin.
But how? I couldn’t remold it since it was no longer spherical. I could pour resin over the top, but then it would dribble out and drip along the sides; the whole thing would need to be re-polished. If I didn’t sand before the pour, would the rough surface be permanently encased in the resin?
I decided to just go for it and pour resin over the rough, unpolished surface to fill the gaps.
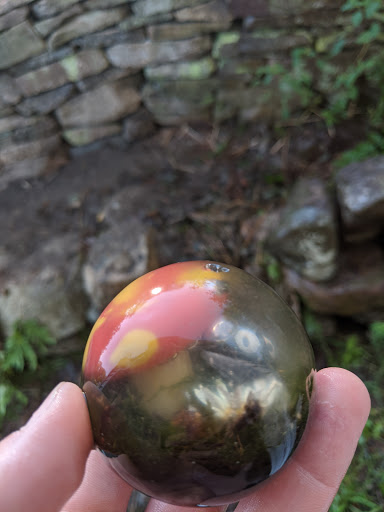
It worked shockingly well – the pouring resin did a better job of “polishing” it than hours of sanding! It did result in drip lines, but I said to heck with that – looks good enough for me! The whole thing came out kind of misshapen and ugly, but the scene within was now clearly visible and time constraints pressured me into calling this “good enough”. I had to check how well the glow in the dark rune worked though . . .
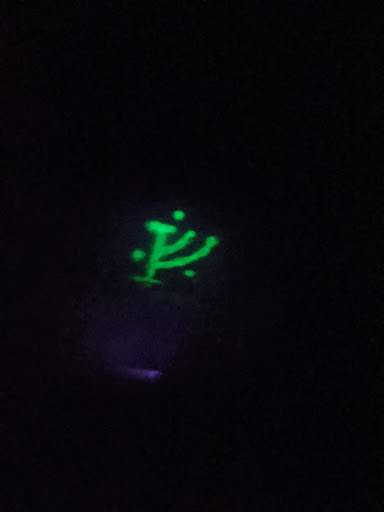
Perfect! I rather un-humbly thought this project was insanely cool and was pleased with myself despite the countless setbacks and failures.
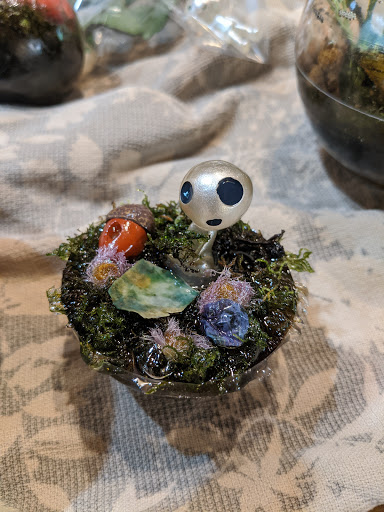
Meanwhile, I tried my new type of resin and some new techniques to make a few more. .
I absolutely love the contented smile on this Kodama’s face with the daisy in his hair, as he sits with his legs crossed in a shell from our recent Kayaking trip – and the ferns all about him like seaweed!

And hey, guess what, this guy glows in the dark too! The way he lights up his shell home just looks amazing in person even though it’s hard to capture. Again, I was just too pleased with myself. My only regret is that due to time constraints and the other projects I was working on, I had to gift this one with the seam line and the plug at the top how they are in the first picture. (If you’re reading this, I can it back and fix it if you want!)
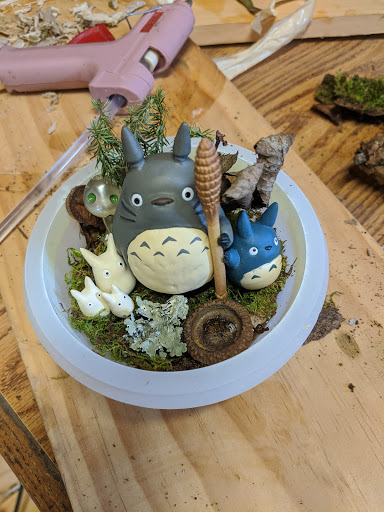
And here we have Big Totoro and his medium and small friends!
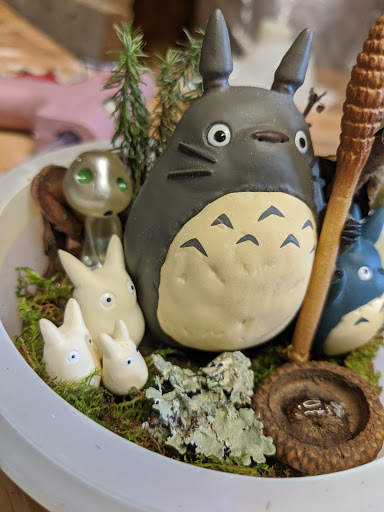
.. as well as another curious Kodama in the back!
I love the blue Totoro reaching for his fathers staff, and the three wide-eyed smallest Totoro’s huddling together for comfort.
This little guy was made out of rushed extras, but it failed horribly because the dreaded moment occurred: the sphere mold came apart while drying and spilled everywhere. This made a huge mess and ruined the pour. But I just gave it away like this! It’s still kind of neat.. right?
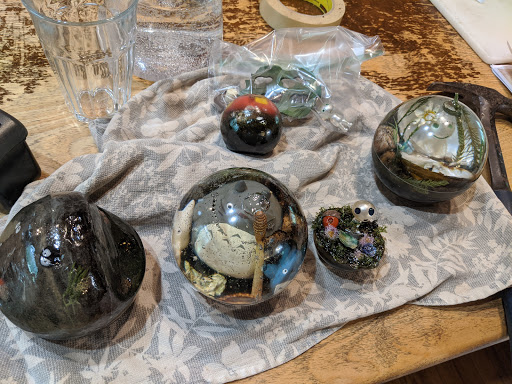
Here is the full cast together!
Despite the imperfections, disasters, and incomplete aspects, I think they came out pretty cool.. what do you think?
I’m not sure how good of a gift they made – what exactly are you gonna do with them? – but they were fun learning projects, and it doesn’t matter if they didn’t come out great because they were totally shown up by my OTHER project, with Evan.. more chocolates!
Which leads us to my next project.. some hasty ordering of some cool dyes, and some rushed amateur carpentry, and I was all set for my final resin attempt. .
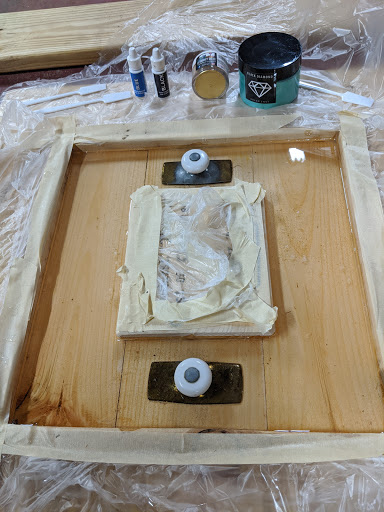
First I had to cover all the areas of my box I didn’t want to get messy, and use hot glue to seal EVERY seam so that the resin wouldn’t all leak out like with a mold!
.. on second thought, I should have taken further precautions.
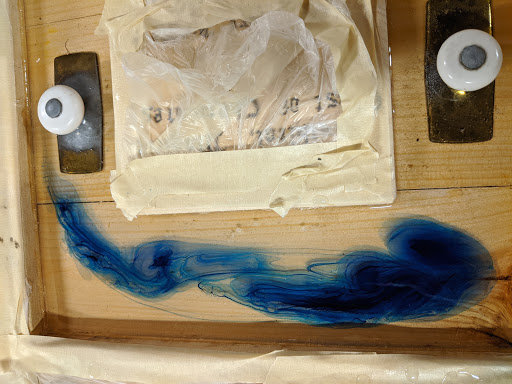
Dropping in bits of dye and swirling it around was really fun to get creative with. . .
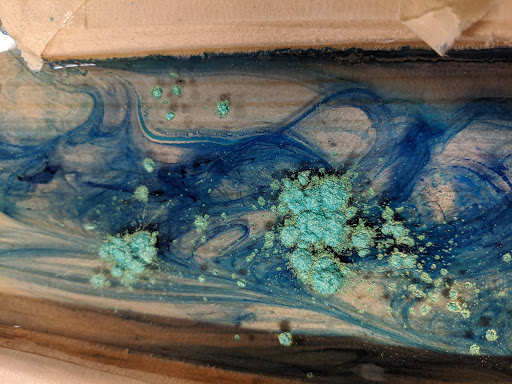
. . . and the emerald and silver powders, too!
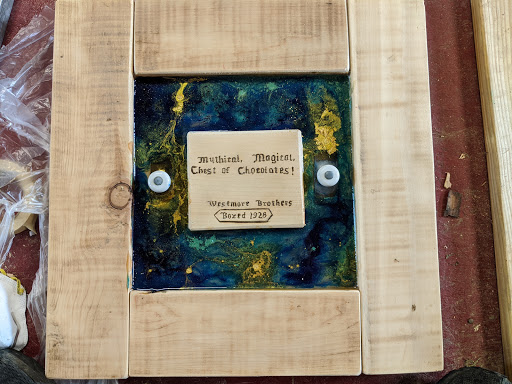
The finish project! I say this a lot, but it really was better than it looks in pictures. I was very happy with how the resin on this turned out.
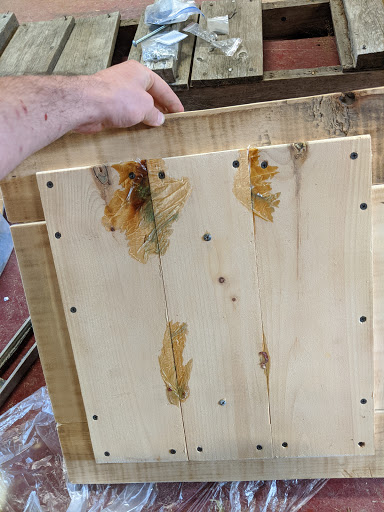
… oops! It still leaked! This is is what I alluded to earlier. It hardened to the floor and I almost couldn’t get it off. That would have really ruined my life. Luckily, I was able to pry it up eventually without breaking anything! (Except peeling some paint off of the floor)
That’s sneak peak at the other project. Another post will be coming soon going into all the exciting details of our two latest chocolate projects since the last time I wrote about it!

This is the most informative article I have ever read!
I’ve been wanting to get into resin projects but I haven’t really known were to start are what supplies to get (so many articles have good and bad reviews on the same product which Is very confusing)
But I feel like with the info you included I have what a need!
LikeLike